I'm working on a client site who uses Calendly to schedule his appointments. There are several reasons people contact him — like to schedule a consultation, send an e-mail question, fill out a loan application, etc — and not all of those reasons require Calendly. However we are streamlining his contact submission process and want everyone to start from the same place, to a single Gravity Form, rather than sending the phone consultation requests off site to Calendly or to a separate page with an embedded form.
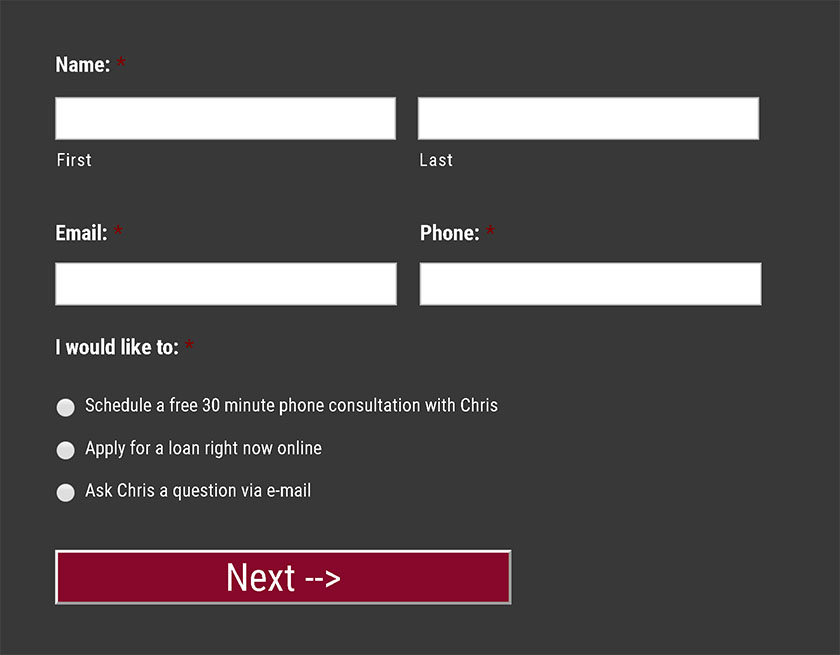
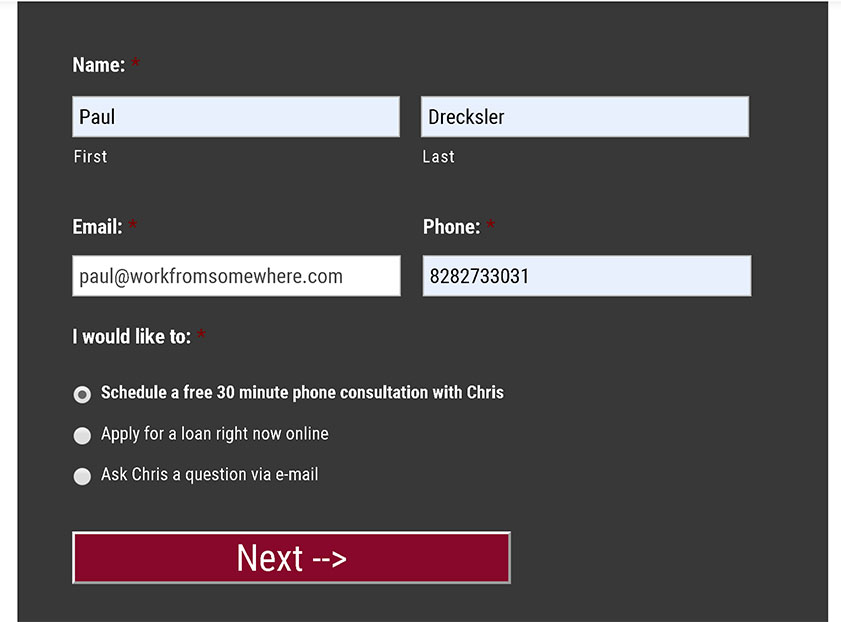
My goal was for people to enter their Name, E-mail, Phone Number, and then choose from a Radio Select Box whether they wanted to A) Schedule a 30 minute phone consultation, B) Fill out a loan application, or C) Send an e-mail with a question. Then they would hit “Next” (ie: Submit button).
From there, they would be directed to various places depending on which option they chose. For example, if they chose “Schedule a 30 minute phone consultation” from the choices above, they would be directed to an embedded Calendly form. And on this embedded Calendly form, I wanted to pass the contact details from the Gravity Form to Calendly so that people didn't have to enter them twice.
This is where I was running into an issue. There's a Calendly help page called Passing contact details from URL which begins to explain the process, but fell short.
Gilbert Mizrahi wrote:
Well, actually that depends on whether or not you have control on the page you are embedding Calendly.
If you are passing the parameters via URL (to the host page), you can pass those parameters to Calendly via sim[ple script. Also, if you have info about the user saved via cookies or local storage, you can pass them programmatically to the Calendly embed. You need to have access to the host page (as a developer) and to know some JavaScript.
Then some guy under the screen name Your Tankfarm Supplier wrote:
For embedded calendly you can pre-fill name and email by adding them to the data-url. But this means you need to dynamically create the embed url. You also need to make sure the info you add is properly url encoded. For example, the @ is encoded to %40.
And then Kendall Berger said:
You are able to pre-populate your embedded Calendly link with your invitee data but this will require the use of a developer to create code that updates your query parameters with the data that is collected from your form in step 1 of your scheduling flow!
Lastly, Amanda Lynn from Calendly said:
Thank you for your continued interest in this feature. Our team is currently looking at how might solve this particular problem and we'd love your input. If you're interested in sharing your use case, please reach out to me at amanda@calendly.com and reference this post so we can get a quick call scheduled. Thanks in advance!
All of those people are correct, except for the part about needing a developer.
Gravity Forms already has a simple way to do this, which I'm going to show you below.
Step 1: Create the form in Gravity Forms
I'm not going to walk you through this because if you're here, you already know how to do that. For my form I had a First Name, Last Name, E-mail, and Phone Number. I'll note that for the Phone Number field, I did not use Gravity Form's “Advanced Fields: Phone”. I instead used “Standard Fields: Single Line Text”. And the reason is because I don't like how Gravity Forms creates an error when people enter their phone number in an incorrect format, so I just prefer to use a Single Line Text field that I change the name to “Phone Number” instead.
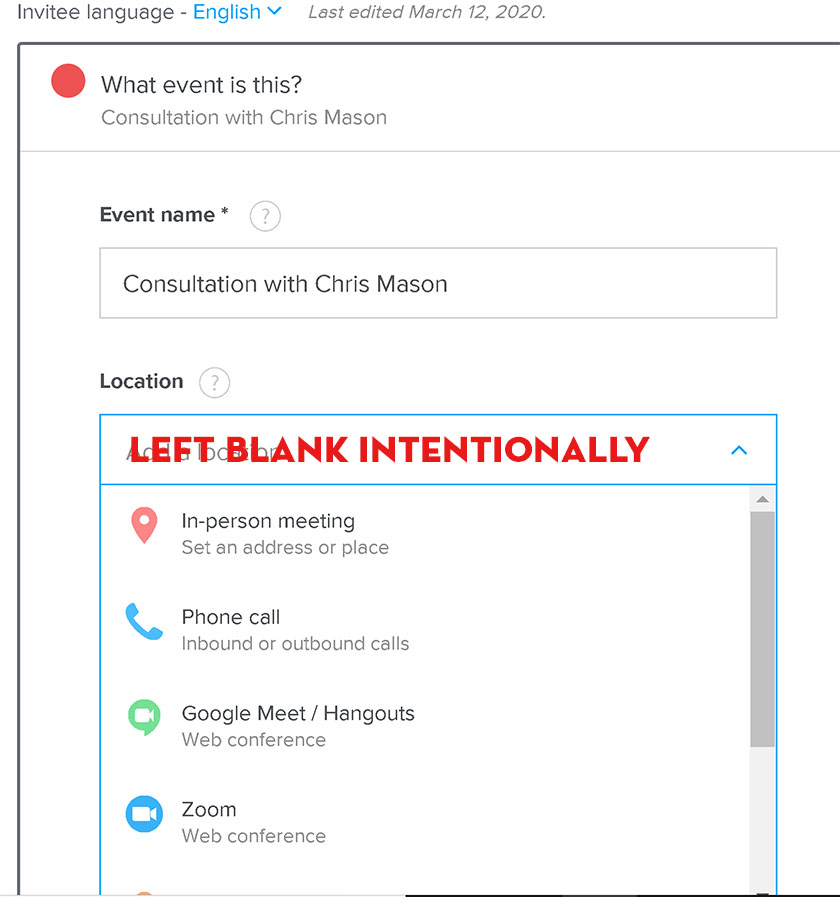
Step 2: Create the Calendar on Calendly
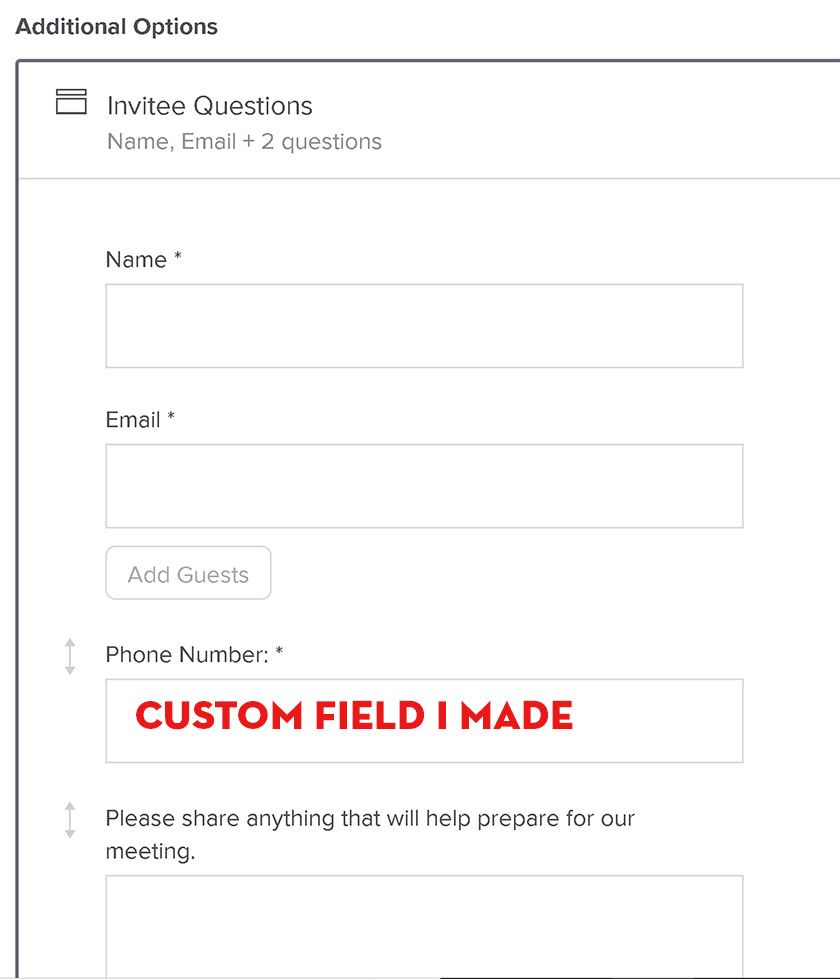
For this step I had to get a little creative. Calendly doesn't allow you to pre-populate their Phone Number field. So when creating the calendar, I left the Location field blank instead of selecting Phone Call, and I instead created a custom field called Phone Number on the next step. This custom field is later referenced as a1. You can learn more about custom fields on Calendly's >Advanced Embed Options page.
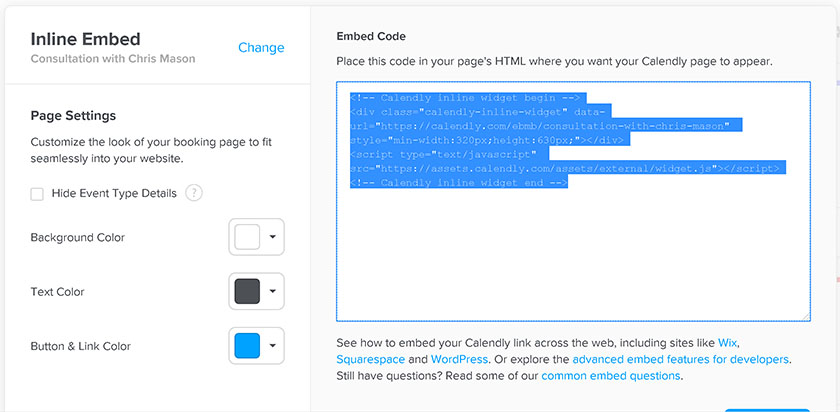
Step 3: Copy the Inline Embed Code from Calendly
Go to your Calendly Dashboard, click the Gear icon on the calendar you just made, and then select Add to Website, and choose Inline Embed. That's where you'll see the code below appear:
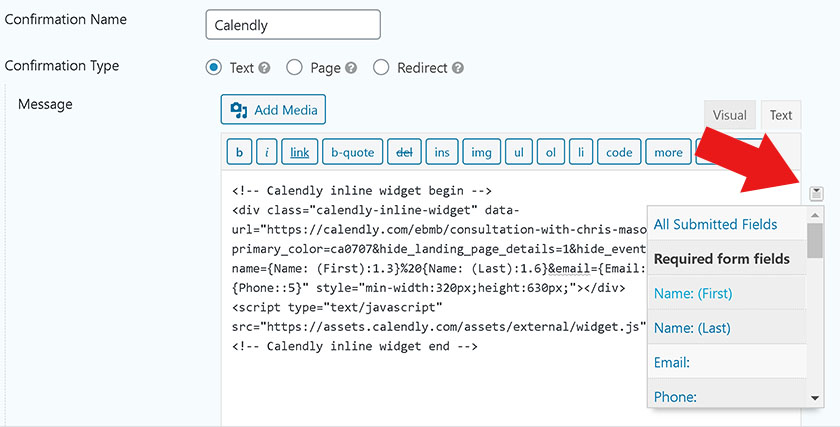
Step 4: Paste the Inline Embed Code into a new Text Confirmation in your Gravity Form
Edit the Default Confirmation or create a New Confirmation. I created a new text confirmation called “Calendly” and then pasted the code from above. In my particular scenario, only one of my radio field options leads to a Calendly form, so I added conditional logic to this Confirmation so that it only appears when someone selects “Schedule a 30 minute consultation with Chris”, however your setup may be different. For example, if all your forms lead to Calendly, then you just use the default confirmation.

Step 5: Edit the “data-url” within that embed code
Originally the code I copy pasted from Calendly had the data-url as:
https://calendly.com/ebmb/consultation-with-chris-mason?primary_color=ca0707
First I added &hide_landing_page_details=1 and &hide_event_type_details=1 because I didn't want that duplicate info on the form since they were already on Chris's site. I grabbed that code from Calendly's help page entitled Advanced embed options. So now the data-url looked like this:
https://calendly.com/ebmb/consultation-with-chris-mason?primary_color=ca0707&hide_landing_page_details=1&hide_event_type_details=1
Then I added the code that would create the dynamic link to auto-populate the Name, Email, Phone fields. I added &name=XXXX and &email=XXXX and &a1=XXXX — which was serving the purpose of my phone number field. Except instead of putting XXX, I filled in the corresponding Gravity Fields Merge Tags for my particular form.
https://calendly.com/ebmb/consultation-with-chris-mason?primary_color=ca0707&hide_landing_page_details=1&hide_event_type_details=1&name={Name: (First):1.3}%20{Name: (Last):1.6}&email={Email::2}&a1={Phone::5}
My merge tags look like {Name: (First):1.3} but yours will be different depending on the ID of your Gravity Form and the name of your fields. You can quickly insert this info using the Merge Tag button on the right.
Success!
So now when someone enters their info on the Gravity Form like below…
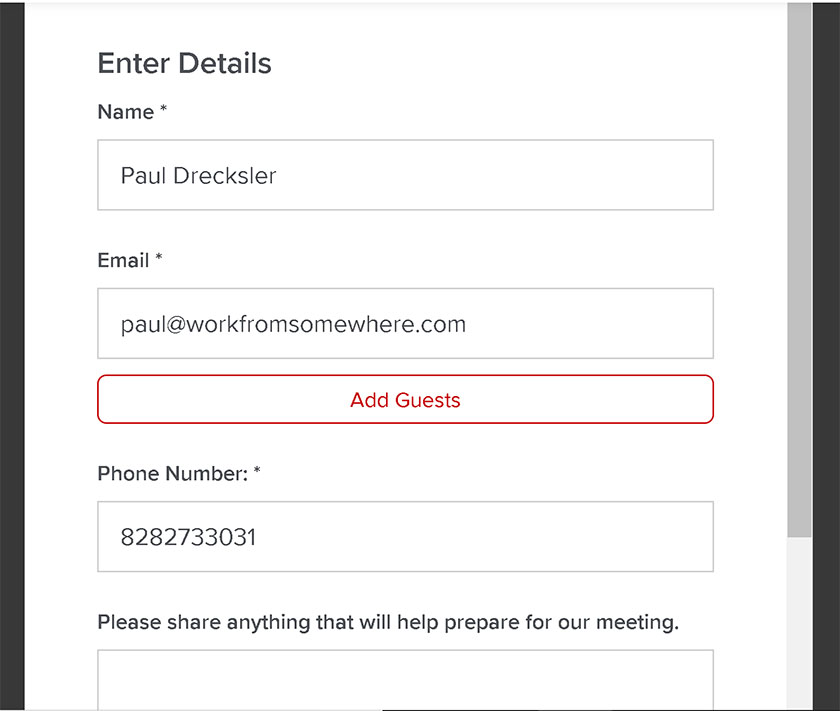
It's automatically inserted into the Embed Fields on the Calendly form on the next step like below…
The only thing I would change….
If I were Calendly, the way that I would improve this process is to create a default field for phone number that we can pre-populate, instead of having to use my workaround to create a custom field for phone number.
Hope that helps anyone else looking to do this but who don't necessarily want to hire a developer. It takes a little paying attention to what you're doing, but no developer required if you're somewhat familiar with Gravity Forms. That being said, if you need me to do this for you, shoot me an e-mail to paul@ideasfocused.com and I'll integrate your Gravity Forms with Calendly for 1 billable hour.
Update 10-7-2021:
Someone just contacted me about doing the above setup on their website, and it reminded me that I've since improved my setup. The improvement is that instead of embedding the Calendly form within a “Success Message” (that replaces the Gravity Form with a message), I've started Redirecting people to a “Confirmation Page” which has the Calendly form embedded.
The reason for the change is that my Success Message was also supposed to trigger tracking pixels — and for some reason, the pixels didn't always trigger. So I decided to change it from Success Message to a separately loading Confirmation Page so that the pixels would be sure to trigger. However this involves one extra step of passing on your Gravity Forms merge tags to your new page (so that you can auto-fill your Calendly on that page).
Since publishing this post, I've outlined those steps in a new post which you can read here.
So basically follow the instructions in this page, and then if you want to use a Confirmation Page instead, continue onto the instructions in my other post.

OMG! I was on a mission to streamline my client inquiries and THIS was exactly what I was looking for. Thank you so much for sharing this. Was so easy to follow.
This is a great tutorial! It works perfectly.
Thank you!