Note: This post contains step by step instructions that are a bit technical in nature. If you'd like me to do it for you, scroll to the end and see my two special offers.
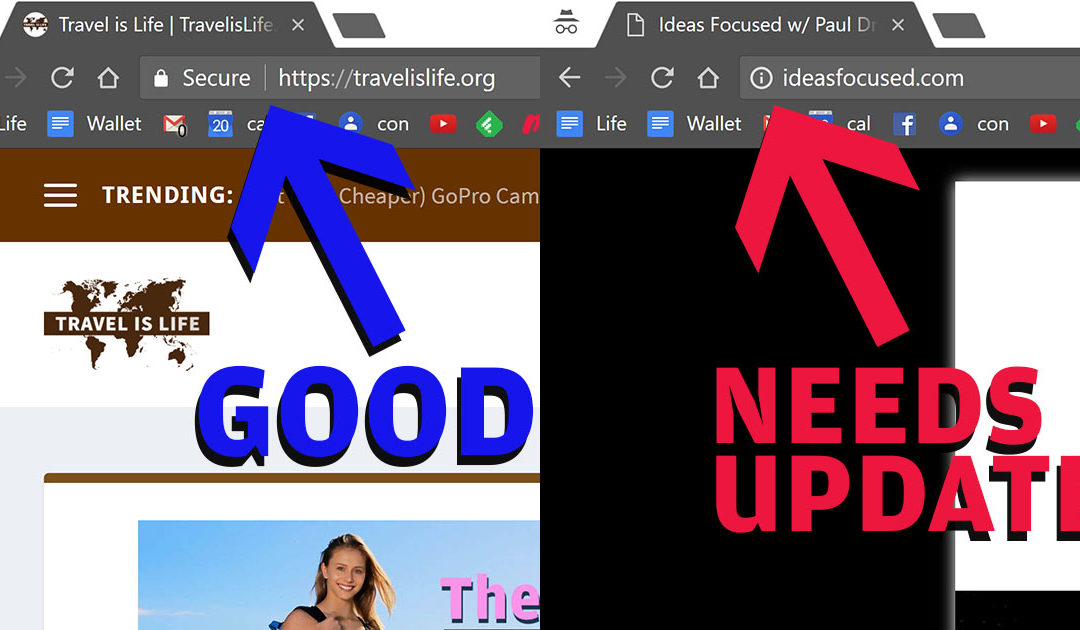
Google's been moving in the “All Sites HTTPS” direction for a few years now, and they've given webmasters and business owners plenty of time to keep up. As of October 2017 though, they're taking a big step that you'll want to pay attention to. In summary, Chrome browser will display the message “This site is not secure” to your visitors if your site is not secured with HTTPS. And you don't want that. The last thing you want is a reason for a visitor to leave your website or feel uncomfortable submitting personal information through it.
Read more here about the change: https://blog.chromium.org/2017/04/next-steps-toward-more-connection.html
Aside from that announcement from Google, which adds some urgency to obtain an SSL Certificate, there are, and have been, many important reasons to secure your site with SSL. In summary those reasons are:
1) Visitor privacy. A secured website helps ensure that your visitors information, including any info they submit to your site, remains private.
2) Google search rank. Google has not been shy about the fact that HTTPS is now a factor in their search rank algorithm, although the weight of that factor has been increasing on a sliding scale for the past few years to give website owners time to catch up.
3) Website security. A site secured with HTTPS makes it more difficult for your website to be hacked, which as you know can be an expensive and messy process to cleanup.
Overall, the web is a better place for everyone if all sites are HTTPS.
Here are instructions on how to install a free SSL Certificate and secure your website with HTTPS.
NOTE: Please BACKUP your website and database before making any changes.
Step 1: Install the SSL Certificate via Let's Encrypt
This will be done through your web host admin. Most of the major web hosts now support Let's Encrypt and offer a one-click installation. For example, I'm on Dreamhost for this blog, and all I have to do is click “Add Certificate” and choose “Free from Let's Encrypt” and the certificate becomes active on my site within minutes. My important sites are hosted on WPEngine and they have a similar process. In a nutshell, Google search, “How to add SSL Certificate to _______” and insert your host name and you should find one-click instructions for most of the major hosts. You can also use your choice of SSL Certificate providers that your host will offer. I've been happy with a free certificate from Let's Encrypt for personal blogs. They are backed by huge Internet companies like Google, Facebook, Cisco, Shopify, etc and should get the job done for you.
Step 2: Search & Replace links and image file paths within your database
Every image, file, and inbound link on your website has a filepath which references the old HTTP version. For example:
OLD: http://yoursite.com/wp-content/uploads/logo-image.jpg
NEW: https://yoursite.com/wp-content/uploads/logo-image.jpg
So you'll need to update that file path to include the “s” in the “http” so that your images don't become broken. You can do this via phpmyadmin with a little bit of SQL code. But if you're reading this, you're probably not very adept with SQL code so use a WordPress Plugin instead. I recommend Velvet Blues Update URLs Plugin for the job because I've used it before (as of recently) and can vouch that it works. However, there are plenty of other “Search & Replace” plugins that'll work too. Instructions are provided on that plugin page.
Step 3: 301 Redirect (Forward) HTTP to new HTTPS URLs
For the past few years, you've been circulating your HTTP website links across the web and social media and other sites have linked to your extraordinary content, right? So you definitely don't want those links to become broken. And you also want to retain the SEO juice you've earned from those links. All you have to do is forward each respective HTTP URL to the new HTTPS version. The best ways to do this are via htaccess or Regex Apache syntax (depending on your host). I recommend that you DO NOT use a plugin for this. Either of the previous mentioned methods are faster, more reliable, and more secure because the redirect happens before the visitor ever reaches your database.
If you're going to do this via htaccess, you can copy/paste this code to the top of your htaccess file. This needs to be done via FTP or SFTP. Be sure to backup your htaccess file first so you can restore the original if you have any issues.
If you're going to do this via regex apache syntax – that's done via your host's dashboard and you'll need to find instructions specific to your host.
Which one is better? Which one should I do? Either method above is fine and typically you won't have a choice. Your host will either allow htaccess (like Dreamhost) or allow regex apache syntax (like WPEngine) but not both.
Step 4: Inform Google of the change via Search Console
So technically you've created a new “version” of your website, and there are now two versions of your website – a secure and a non-secure version. And similar to how Google looks at the HTTP-only and HTTP-WWW URLS of your website as two different versions, they also look at HTTPS and HTTP as separate sites. So the next step is to go to your Google Search Console and Bing Webmasters and add a new property to each with your HTTPS URL, resubmit your sitemaps, and force crawl your site. If you don't do this, Google will eventually catch up, but this will help them expedite the process by telling their spiders what to look for instead of having to figure it out on their own. And the more helpful you can be to Google's spiders, the faster the updates in their system will take place.
Step 5: Test your forms and API connections and update links accordingly
The last step is to test everything. Test your submission forms on your website, your e-mail sign up forms, and any widgets you use. For example, you may use a Instagram widget that displays your latest IG photos, and that widget uses the old HTTP URL to your site and needs to be updated. Many widgets will continue to work properly after you do the 301 redirects in step 3, but others may require that you login to the setup screen and update the link to your site to include the HTTPS.
And now you're all set. Your search rank may temporarily be affected, as some website owners have indicated after making the switch, but your search placement should return shortly after. By performing step 4 and informing Google and Bing of the changes, that will help to expedite the transition.
Is this too technical for you?
I'm not ignorant to the fact that the above may be too technical for you if you're not a developer or web admin. I tried my best to provide step by step instructions above, but the reality is that the process will be different depending on which host you use and other factors, and there's no way that I could possibly provide step by step instructions for each possible individual scenario. The best thing you could do if attempting to do this yourself is to first backup your website and database in case you mess up, and second use the steps above as guide, but consult your host on how to accomplish each one specific to their platform. But if you still don't want to attempt this on your own, respect, I've got two special offers for you below.
Special Offers: Do it for me, Paul.
SPECIAL OFFER #1) No problem. For $99 I'll do it for you. Just e-mail paul@ideasfocused.com with the subject Secure my site and I'll reply back to you with what I'll need to accomplish this for you, which is mainly access to your host and WP-Admin. I'll of course backup your site before making any changes and also help you test it. To put this in perspective for you on why this is a very special offer, $99 is less than I charge for one billable hour at my agency. I created this special offer mainly for members of my travel bloggers tribe since I learned that 75% of them currently DO NOT secure their sites, but I'll also extend the offer to readers of this blog up until Oct 31, 2017. After that, I'll still help you, but at our regular fee structure.
SPECIAL OFFER #2) Sign up for WPEngine – my host of choice for bloggers – using my affiliate link and I'll transfer your site over for free and also secure it with HTTPS during the process. I earn a commission for referring new customers to WPEngine and that commission will (almost) cover the time put into transferring your site over. To take advantage of this offer, just use my link below, and then e-mail me at paul@ideasfocused.com with the subject Signed up for WPEngine and I'll provide instructions from there.
Paul's Affiliate Link: https://workfromsomewhere.com/go/wp-engine
Switching to HTTPS and making a change like this is a good time to re-evaluate your hosting needs in general, which is why I'm offering this second option for bloggers. The reason I recommend WPEngine for do-it-yourself bloggers is because they've got daily backups, staging environments, server-side caching, and they actively monitor their servers and website to avoid vulnerabilities and prevent you from being hacked. For $29/month (for up to 25,000 visitors), it's peace of mind that your site will work when you need it to and won't crash when one of your posts go viral like those cheap shared hosts. And I find that it's easiest to get all the things they offer in one plan than try and piece together the same set of tools using a host and 3rd party software. There are plenty of other good hosts out there. I've just personally had a lot of success with WPEngine and send a lot of people their way. One downfall of WPEngine to keep in mind is that they do not offer e-mail so if you've got custom domain e-mail addresses setup, we'd have to get you over to Zoho or Google Suite or an alternative.
Which special offer is better for you? That's up to you. Whatever you do though, don't pick neither. It's important that you get your site secured with HTTPS before the end of October so hit me up before then. If you have any questions, you can e-mail me at paul@ideasfocused.com

Trackbacks/Pingbacks